A secondhand cast-iron skillet: what to check, how to restore it, and how to keep it going
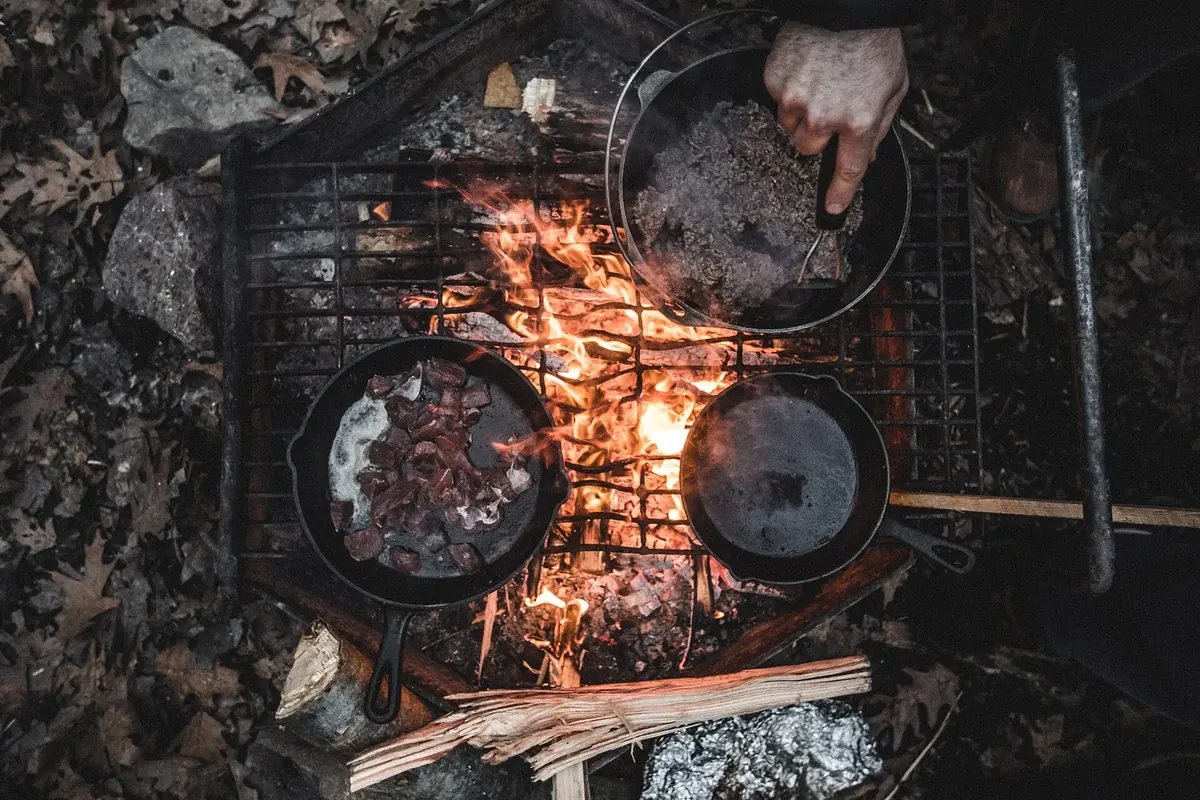
Almost every thrift shop has one: a heavy black skillet on the bottom shelf of housewares, a little rusty, priced as if nobody wanted it. Cast iron is one of the few kitchen tools that does not wear out with use, which makes it one of the best things to buy secondhand. The skill is in telling a pan that only needs a weekend of work from one that will never cook properly again, and that takes about two minutes at the shelf.
Why buy it used
A cast-iron pan is a single piece of metal with nothing to peel, chip or wear through. The black surface that makes it useful is not a factory coating but seasoning: thin layers of cooking oil that have been heated until they harden and bond to the iron. Lodge, a cast-iron foundry in South Pittsburg, Tennessee, describes seasoning as oil baked onto the pan through polymerization, and notes that every time you cook with fat you add another layer. A skillet that has been cooked in for years has had a lot of those layers built up.
That is also why rust on a used pan is rarely a disaster. Seasoning can be stripped off and rebuilt; the iron underneath is what you are actually buying. What you cannot fix is the iron itself, so that is where the checking goes.
At the shelf: four checks
1. Look for cracks. Turn the pan over and look closely at the bottom and around the base of the handle, then tilt it under the light. A crack is a fine dark line that does not wipe away, and it usually runs from the rim toward the centre. If you can, hang the pan from a finger by the handle hole and tap it gently with a knuckle or a key: sound iron rings, a cracked pan gives a dull clunk. A cracked skillet goes back on the shelf, whatever the price. It can split further once it is heated.
2. Check that it sits flat. Pans that have been heated hard while empty, or plunged cold into water while hot, can warp. Set it on a flat counter or a shelf and press on the rim at different points. If it rocks or spins on a bump in the middle, the bottom has bowed. A slight warp matters less over a campfire grate than on a glass or induction cooktop, where the pan needs full contact; on those, pass.
3. Feel the cooking surface. Run your fingers over the inside. Rough, sandy texture is normal on many modern pans and smooths out with use. Deep pitting, small craters left where rust has eaten into the metal, is different: light pitting is mostly cosmetic, but a heavily pitted surface never holds seasoning evenly and food will catch in it.
4. Tell rust from crust. Orange or red patches are rust, which can be removed. A thick, flaky or bumpy black layer, especially on the outside walls, is usually old carbonized grease. It looks worse than rust and is not a reason to walk away, but it is a reason to expect some scrubbing.
Checklist
Before you pay
- No cracks, top or bottom, and it rings when tapped
- Sits flat, no rocking or spinning
- Surface smooth or lightly textured, not deeply pitted
- Rust is surface rust, not holes
- Handle and helper handle solid, no welds or repairs
- Enamelled pan? Check for chips in the enamel (see below)
A note on old names and enamel
Older American skillets from foundries that no longer exist are collected, and the names cast into the bottom can push the price far beyond what a working pan is worth. If you want something to cook with, you do not need a famous name; an unmarked pan in good condition cooks just as well. Lighter, smoother old pans are pleasant to use, but heavy modern ones hold heat longer, which is useful at camp.
Enamelled cast iron, the kind with a glossy coloured coating inside, is a different object. It does not need seasoning and cannot be stripped the same way. On a used enamelled pot, chips or deep cracks in the interior enamel, or a cooking surface worn down to bare iron in patches, are reasons to pass.
Bringing a rusty pan back
Most thrift-shop skillets need only light work. Scrub the rust off with steel wool or a stiff brush and hot water; a little dish soap is fine. Keep going until you see dull grey or black iron rather than orange. Rinse, then dry the pan completely, first with a towel and then on a burner over low heat for a few minutes, because water left in the pores of the iron will start new rust within hours.
For a pan coated in old, flaking buildup, the job is bigger. Many restorers use a lye-based oven cleaner, sprayed on, sealed in a plastic bag for a day or two, then scrubbed off. Lye is caustic: wear gloves and eye protection, work outdoors or with plenty of air, and follow the product label. Do not put a pan in a bonfire to burn off the crust; uneven fire heat is one of the ways cast iron cracks and warps.
Once the pan is clean and bare, it needs seasoning straight away. Lodge's instructions are simple and match what most restorers do. Wash and dry the pan completely. Rub a very thin layer of cooking oil over every surface, inside and out, then wipe it back off until the pan looks almost dry; too much oil leaves a sticky, blotchy finish. Bake it upside down in an oven heated to 450 to 500°F for one hour, with foil on the rack below to catch drips, then turn the oven off and let the pan cool inside. Lodge suggests an oil with a high smoke point, such as vegetable oil, canola oil or melted shortening. Two or three rounds give a sturdier base than one. You can read their guidance on the science of cast-iron seasoning.
The first few cooks will still show patches. That is normal. Fry something with plenty of fat for the first week, such as bacon, potatoes or the grilled cheese with sage butter, and the surface evens out.
Everyday care
- Wash it soon after cooking. Hot water and a brush are usually enough. A small amount of soap does not hurt established seasoning; long soaks in the sink do, because they invite rust.
- Dry it at once, and warm it on the burner for a minute if you have time.
- Oil it lightly while it is still warm: a few drops rubbed in with a paper towel, then wiped off.
- Store it dry, with the lid off or a paper towel between stacked pans so moisture cannot collect.
- Go easy on long acidic cooks. Tomato sauce or wine simmered for a long time can wear thin seasoning and leave a metallic taste. Once the pan is well seasoned, quick cooks with acid are fine.
If you have also picked up clay cookware, the rules are not the same: our guide to La Chamba black clay pots covers curing and caring for those.
Taking it camping
A secondhand skillet is the ideal camp pan, because you will not mind the scratches. Over a fire, put it on a grate or a flat bed of coals rather than in the flames, heat it slowly, and keep a heavy glove or pot holder within reach, since the handle gets as hot as the pan. Our campfire and camp stove safety checklist covers the rest. At camp, scrape the pan out while it is still warm, wipe it with a little water and a cloth, dry it over the fire, and rub in a drop of oil before packing it in a bag of its own. Do not leave it soaking in a dishwater bucket overnight; you will find the rust in the morning.
Rust that does appear, at camp or at home, is never the end. Scrub it off, dry the pan, oil it and heat it, and it is back in service. That is the whole appeal of cast iron: a pan someone gave away for a few dollars can still be cooking breakfast for whoever inherits it from you.
 Camp & seasonal kitchen
Campfire and camp stove safety
Stoves, fire rings, putting a fire out cold, and carbon monoxide.
 Camp & seasonal kitchen
Campfire doughnuts from canned biscuits
Gear, oil depth and temperature, frying safely outdoors, coatings.
 Trails & campsites
Family camping for beginners
Campground, gear, sleeping warm, food, and keeping kids happy.