Reviving a secondhand wooden table, chair or dresser: clean first, repair second, refinish last
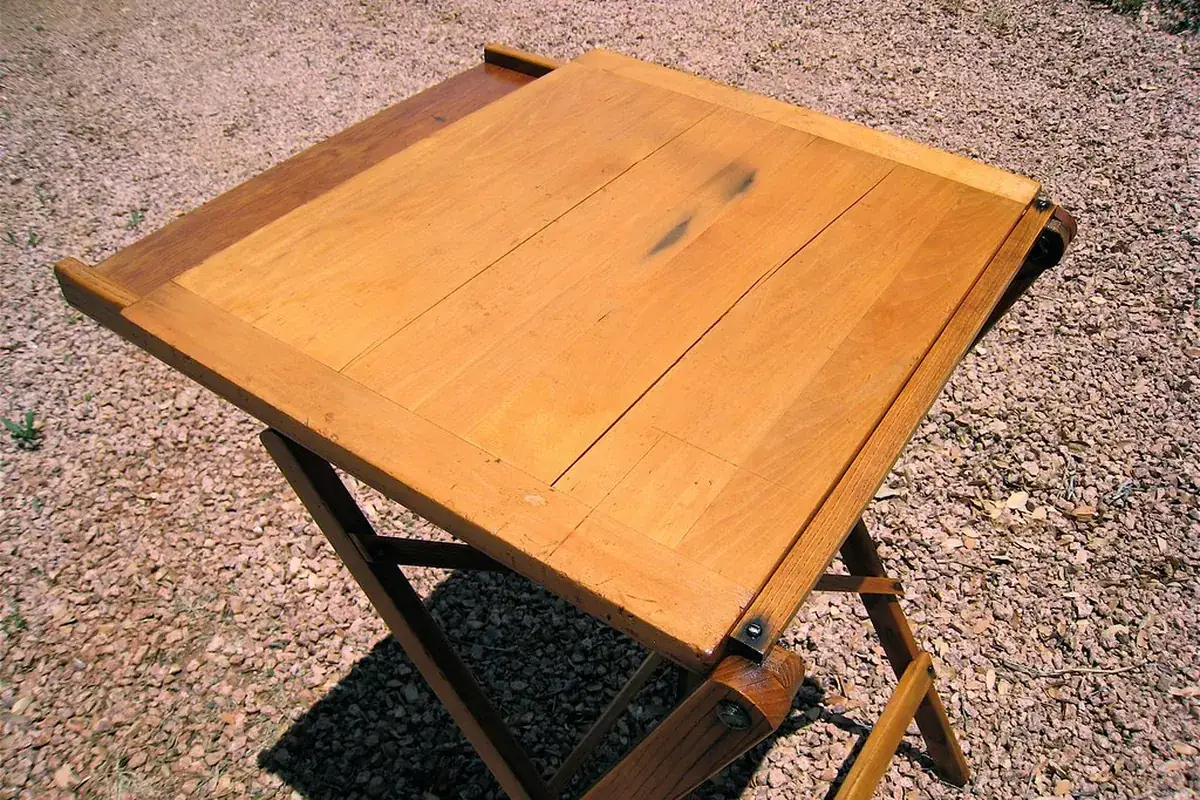
The table is home, it was cheap, and it looks tired. The temptation is to go straight for the sandpaper. Resist it for a weekend. Most secondhand wooden furniture needs far less than a full refinish: a proper clean, a little attention to the joints and a fresh coat of wax will often bring back a finish that has been protecting the wood for decades. Sanding removes that finish for good, along with some of the character you paid for. Here is the order that wastes the least effort and does the least harm.
Step 1: find out what you are dealing with
Before you clean anything, you want to know two things: whether the piece is solid wood or veneer, and what the finish on top of it is. Our guide to buying secondhand furniture shows how to read the edges and the underside for solid wood and veneer. Veneer matters here because it is thin: an enthusiastic sander can go straight through it, and that is very hard to hide.
For the finish, furniture restorers use a simple test on a hidden spot, such as the back of a leg or the underside of a drawer front:
- Dab on a little denatured alcohol (methylated spirits) with a cotton bud. If the finish softens and turns sticky within a minute or so, it is most likely shellac, the traditional French-polish finish of much older furniture.
- If alcohol does nothing, try lacquer thinner on another hidden spot. Softening points to lacquer, common on mid-century factory pieces.
- If neither has any effect, you are probably looking at a modern varnish or polyurethane, which is the toughest of the three.
- A surface that feels dry and woody, with no film at all, may be an oil or wax finish.
Work with the window open and keep these solvents away from flames; they are flammable. The answer tells you what will repair the finish, and also what will damage it: alcohol spills, for instance, are the natural enemy of shellac.
Step 2: clean it properly
Years of hands, cooking and polish leave a grey, sticky layer that makes any finish look dead. Start mild and only step up if you need to.
- Dust it and vacuum the crevices, carvings and drawer corners with a brush attachment.
- Wash with mild soap. A few drops of washing-up liquid in warm water, a soft cloth wrung out until it is barely damp, and small sections at a time. Dry each section straight away. Never flood the surface or leave water standing on it.
- For stubborn grime on a sound finish, a little mineral spirits (white spirit) on a cloth will cut old wax and grease without dissolving shellac, lacquer or varnish. Test first, wipe off, and let it air.
- Wax it. Once it is dry, a thin coat of paste furniture wax, buffed with a soft cloth, restores the sheen and gives a little protection. Thin coats, well buffed, look better than thick ones.
You will often be surprised. Plenty of "worn out" tables are simply dirty.
Step 3: deal with the marks
White rings and cloudy patches usually mean moisture trapped in the finish rather than damage to the wood. They often fade with time, with gentle warmth from a hair dryer on a low setting moved constantly over the mark, or with a very light rub using wax on fine steel wool, following the grain. Go slowly; stop when the mark goes.
Dark rings and black stains mean water reached the wood itself. These do not polish out. They need the finish removed locally or entirely, and sometimes a wood bleach. If the mark is on a piece you otherwise like, consider living with it, or a cloth.
Small scratches on a dark finish can be disguised with a matching wax filler stick or a furniture touch-up marker. On shellac, a careful wipe with a cloth barely moistened with alcohol can melt fine scratches back together, though this is a skill worth practising on something you do not mind ruining.
Step 4: make it solid again
A wobble is the most common fault in old chairs and tables, and the most important to fix, because a loose joint wears itself looser every time someone sits down.
- Tighten the hardware first. Many tables and chairs have corner blocks or bolts under the seat or top. A screwdriver and a spanner fix a surprising number of wobbles.
- Reglue joints that move. Glue only holds on clean wood, so a loose joint has to be taken apart, the old glue scraped off, and then reglued and clamped. Older furniture was often assembled with hide glue, which can be softened and redone; modern wood glue does not bond well to old glue left in the joint. Squeezing new glue into a loose joint without opening it rarely lasts.
- Drawers that stick usually need their runners cleaned and rubbed with a candle stub or a little paste wax. A drawer that drops when pulled out may have worn runners that can be built up with a thin strip of hardwood.
- Replace missing knobs with something that suits the age of the piece. Secondhand shops and salvage yards often sell odd handles by the box.
Anything tall, such as a dresser, bookcase or wardrobe, should be anchored to the wall once it is in place, especially in a home with children.
Toolkit
A small furniture kit
- Soft cloths, a soft brush and a bucket of mild soapy water
- Mineral spirits and denatured alcohol, for testing and cleaning
- Paste furniture wax and fine steel wool
- Wood glue, a few clamps and a scraper
- Screwdrivers, a spanner set and felt pads for the feet
- A metal can with a tight lid, for used rags (see below)
Step 5: refinish only if you must
A full refinish makes sense when the finish is flaking, badly worn through to bare wood, or damaged by dark stains you cannot live with. It is a weekend at least, and a messy one.
If you go ahead, stripping with a chemical stripper before sanding usually saves both effort and veneer. Use a product sold for home use, work outdoors or in a very well-ventilated space, wear the gloves and eye protection the label asks for, and follow its directions to the letter. Then sand lightly, by hand, with the grain, working through finer grits, and dust off thoroughly before you apply anything. A wipe-on oil or a few thin coats of a wipe-on varnish are the most forgiving finishes for a first project.
Painting is the other honest choice, particularly for a piece in poor-quality wood or with veneer damage. It suits the kind of mismatched, personal room we wrote about in a calm bedroom on a small budget.
Two safety points that matter
Old paint. Paint on furniture from before the late 1970s may contain lead. The US Environmental Protection Agency notes that the federal government banned the sale of lead-based paint for use in homes in 1978, and that dust and chips from old paint are one of the most common sources of lead exposure at home. Do not dry-sand or heat-strip old paint of unknown age. Test it with a lead test kit, keep it sealed under new paint if it is sound, or have it stripped professionally, and keep children and anyone pregnant well away from the work.
Oily rags can catch fire on their own. Linseed oil and many other drying oils, the main ingredient of oil finishes and some waxes, give off heat as they cure. A crumpled pile of rags soaked in them can trap that heat until the rags ignite, hours after you have finished. Lay used rags flat outdoors to dry completely, or drop them into a metal can filled with water and closed with a tight lid, and dispose of them as your local rules require. The same care applies to the oil you used on a secondhand cast-iron skillet.
Done slowly, none of this is difficult. A clean, solid, waxed piece of old furniture will outlast most new ones, and the next owner, whoever finds it in a thrift shop years from now, will have very little to do.
Sources
- U.S. Environmental Protection Agency, Protect your family from sources of lead: lead-based paint in homes and the 1978 ban.
- Wikipedia, Linseed oil: drying by oxidation, and the risk of spontaneous combustion of soaked rags.
 Home & handmade
Checking secondhand furniture
Solid wood or veneer, joints and drawers, woodworm, bed bugs, old paint and the pieces best bought new.
 Home & handmade
First home on a small budget
An honest budget, the neighbourhood first, what to check before you sign, cheap repairs and a secondhand start.
 Home & handmade
A calm bedroom on a small budget
Edit, set a colour plan, layer textiles and shop secondhand.